
Hello everyone!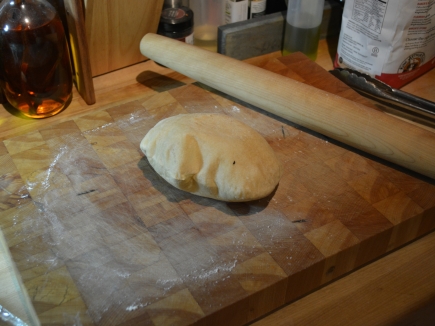
Who doesn’t love bread? I know we all feel like Oprah in that commercial, “I Love Bread. I. LOVE. BREAD!”
While we enjoy the carb-filled goodness, many of us don’t love making bread. It can be time consuming. It can be frustrating. But, my partner and I have been slowly been perfecting a recipe for our favorite kind of bread—pita bread!
Is it worth making pita at home? Absolutely. Store-bought pita is often several days old and simply doesn’t taste as good as hot out of the oven bread. Warm, toasty home-baked pita is worth the effort. It puffs up perfectly for ‘pocket pita’ sandwiches and pairs great with your favorite hummus.
This pita bread recipe produces a nutty, rich flavor along with a light, airy consistency. Once you taste it, you won’t be buying pita bread at the store again. … Okay, at least not when you have the time to make your own.
What are you waiting for? Give it a shot!
Cheers & happy cooking!
Jocelyn
Homemade Pita Bread
***Please feel free to share widely, just give me some credit or a link back. Heavily adapted from Serious Eats. Check them out!
Prep Time: 50 minutes
Rise Time: 60 minutes
Proof Time: 20 minutes
Yield: ~Six 5″ pitas
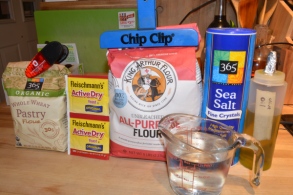
Ingredients
- 1 cup warm water
- 2 cups all-purpose flour, plus extra
- 1 tablespoon real vegan sugar
- ½ cup whole wheat flour
- 1½ teaspoon salt
- 2¼ teaspoons instant yeast
- 1 tablespoon extra-virgin olive oil, plus more (EVOO)
Directions
- Move oven rack as low as it will go, and preheat oven to 500 degrees F.
- In a large mixing bowl, combine the warm water, EVOO, vegan sugar, yeast, salt, and whole wheat flour with a wooden spoon.
- The consistency should be smooth.
- Next slowly add in the all-purpose flour.
- The dough will begin to look a bit rugged.
- Knead the dough in the bowl for 10 minutes.
- Eventually the dough should become elastic and smooth.
- If it’s too sticky to work with add a small amount of all-purpose flour.
- Eventually the dough should become elastic and smooth.
- Take the dough out of the bowl and roll it into a smooth ball on a lightly floured area.
- Coat a new mixing bowl with EVOO and place the dough ball inside.
- Roll the ball around the oil making sure to coat all sides.
- Cover the bowl with a damp cloth and then let it rise for one hour.
- Line a baking sheet with a large kitchen towel and set aside.
- Flatten the dough and place it on your lightly floured work area.
- Cut the dough into six sections.
- Take each section and roll the dough into a ball.
- Put the dough balls on a plate and cover them with cling wrap (lightly oiled) or a damp towel to rest for 10 minutes.
- Roll each piece of dough into a 5-7 inch circle.
- Aim for ¼ inch in thickness all around.
- Cover the dough again to proof until it starts to puff up — 15-25 minutes.
- Take each dough section and place it in the oven to bake until it puffs up and is golden brown. Do not overcook! This should take just a few minutes.
- After each pita is made, place it on a towel lined sheet and cover with another towel.
- Repeat until all pitas are baked.
- If you would like a toasted, charred look and taste add the following steps:
- Heat a griddle or cast iron skillet until smoking.
- Briefly heat each pita until slightly charred. This will happen very quickly due to the high heat.
- Return the pita to the towel lined sheet and cover.
- Serve immediately with your favorite hummus or other dip!
They look so tasty, just mouth watering tasty.
Thanks so much! I hope you find the time to give the recipe a try!
I am a bread “lover”, so I will convince my SO to try this recipe this weekend!
Sounds wonderful!
This looks delicious! I’ve always wanted to try making my own pita bread! Now you’ve got me ready!
I would eat this ALL the time! I know that I definitely feel the same as Oprah!! I was also wonder what is the difference between regular sugar and real vegan sugar? Thanks for sharing! 🙂
Some sugars are surprising grated using bone in the processing. I tend to purchase a vegan-friendly sugar from Whole Foods. There are lots of smart phone apps out now that can tell you if a product is vegan by barcode.
yum! this looks so good, I always love the warm pita served at greek/halal restaurants.
This is very similar and not too difficult to make. The char adds a great flavor!
I love love LOVE pita bread! Especially trying new recipes for it!